Order Tags are a powerful feature to keep everyone on your team focused on the orders that matter most to them.
In order to use them effectively, the tags must be accurate and up to date.
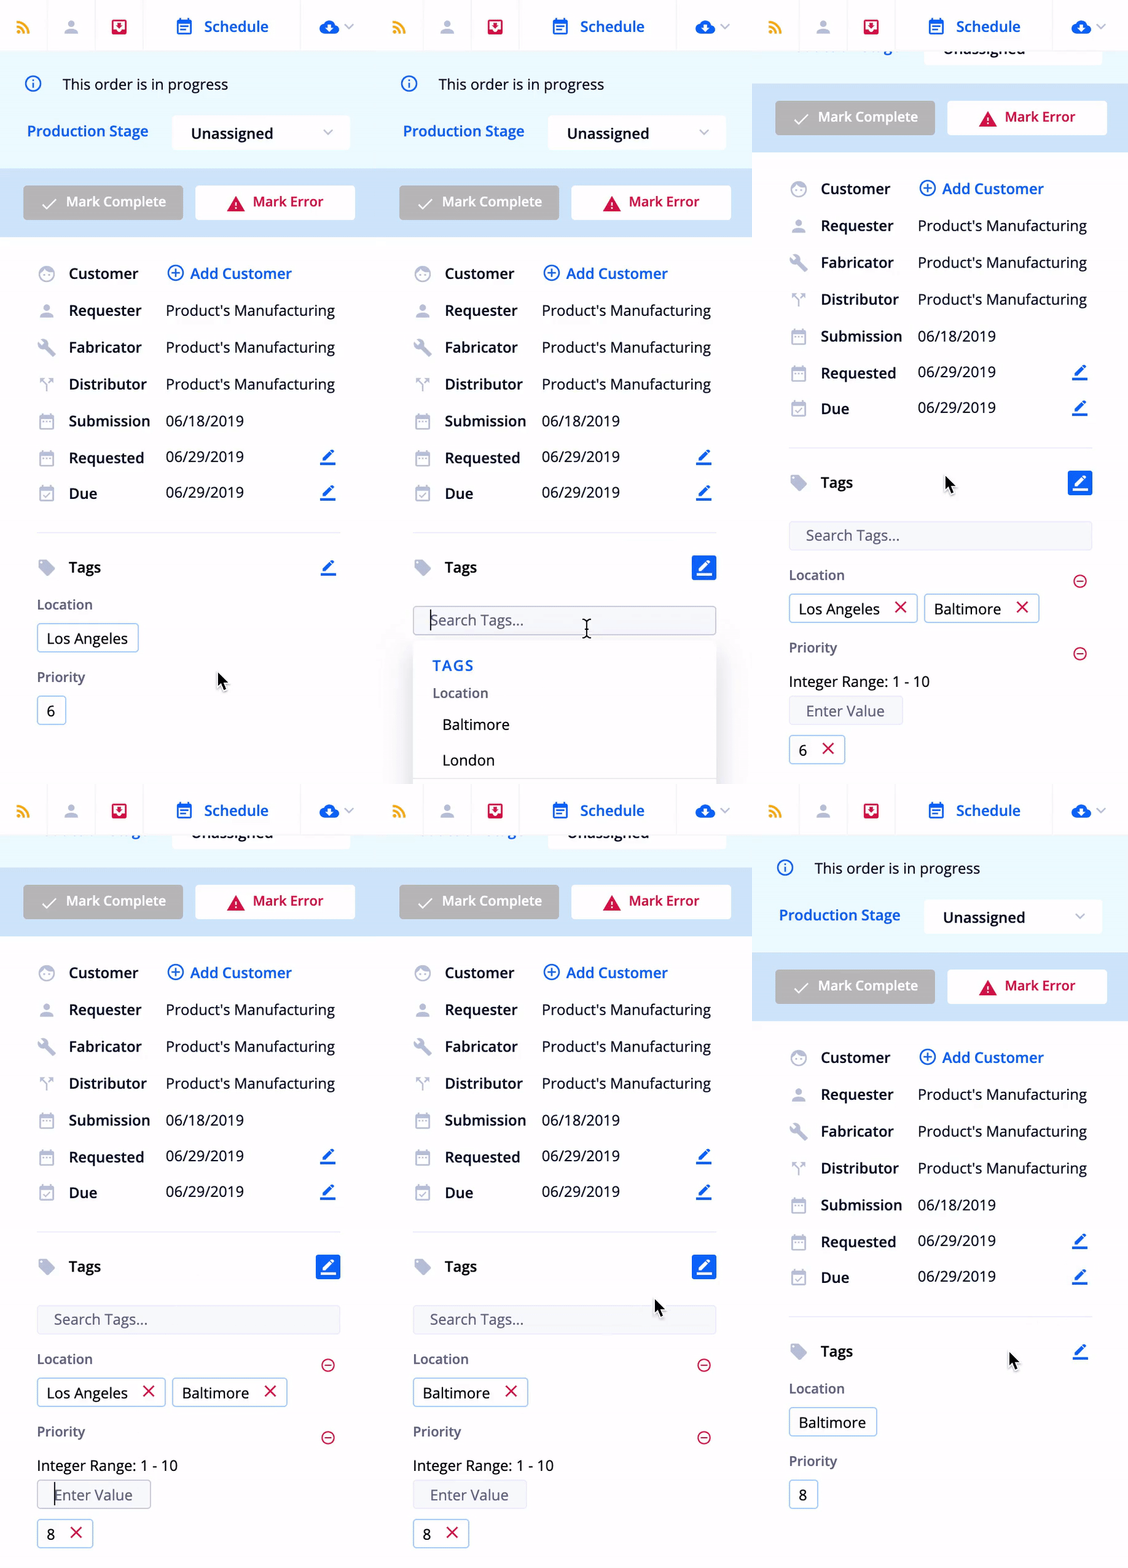
- Click the ‘Edit Tags’ icon in the Order Info Panel
- Use the type-ahead dropdown to find and select the tag(s) you’d like to apply to the order
- If you selected a Range Tag, you need to type the appropriate number into the input box and press ‘Enter’ (learn more about tag formats)
- If there are tags applied that you’d like to remove, click on the remove icon next to the tag or remove all tags from a Tag Group by clicking the remove icon next to the Tag Group Name
- Finally, click the ‘Save Tags’ icon in the same location as the ‘Edit Tags’ icon

That’s it! At this point, if any configured rules dependent on those tags will run and automate the desired actions.
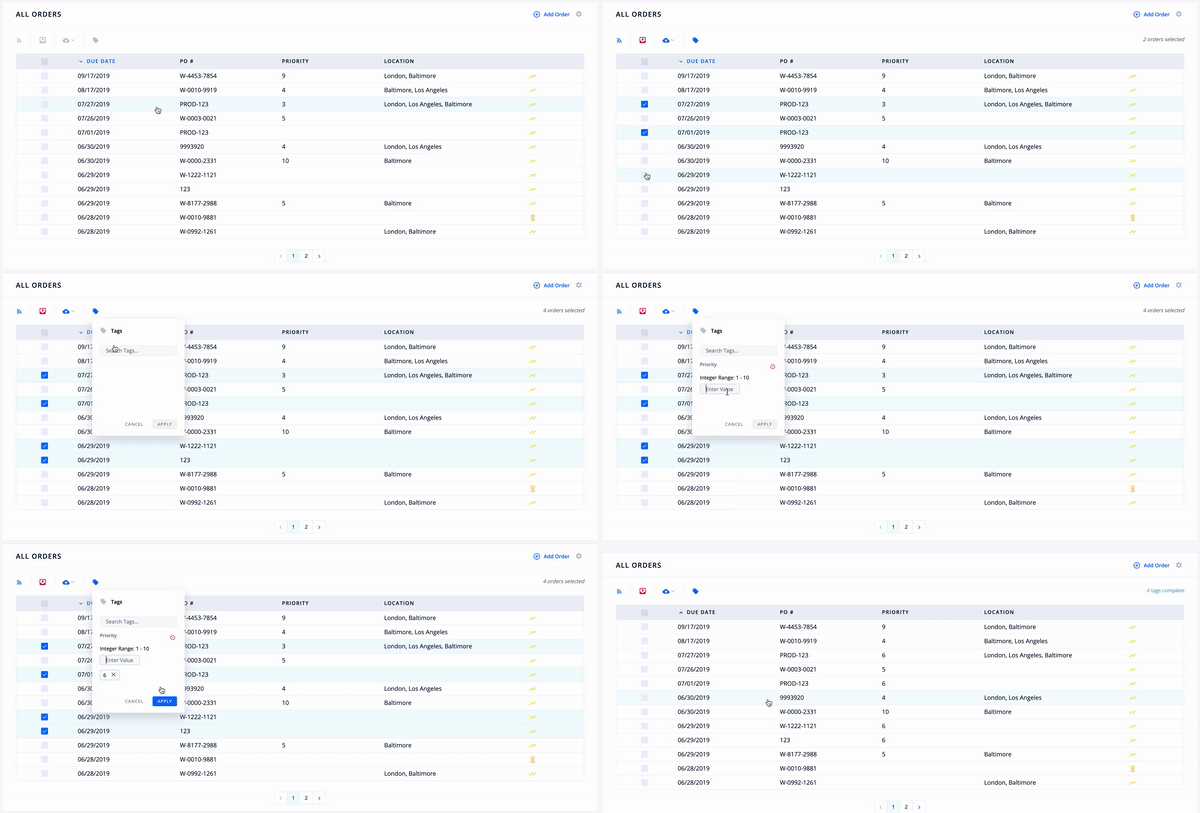
- Select all orders that need to be tagged with the same tag
- Click the ‘Tag’ icon in the Bulk Actions bar (learn more about Bulk Actions)
- You will see the same type-ahead dropdown component as you would on the Order Overview, find and select the tag(s) you’d like to apply to the selected orders
- Note: you cannot remove tags from the bulk actions bar
- If you selected a Range Tag, you need to type the appropriate number into the input box and press ‘Enter’ (learn more about tag formats)
- Finally, click the ‘Apply’ button at the bottom of the pop-up.

Be aware, when the tags are applied, the table will refresh and depending on your View, the orders may or may not be present in your table. You can always verify at the top right of the table the the tag applications have been completed.


